
The Importance of a Properly Functioning Brake Booster
A well-functioning brake booster is essential for safe driving, as it ensures that your vehicle’s braking system operates effectively and responsively. When a brake booster fails, it can compromise your ability to stop quickly and securely, putting you and others on the road at risk. In this ultimate guide to brake booster replacement, we’ll discuss what brake boosters are, how they work, the signs of a failing brake booster, and how to replace and maintain them to boost your vehicle’s safety.
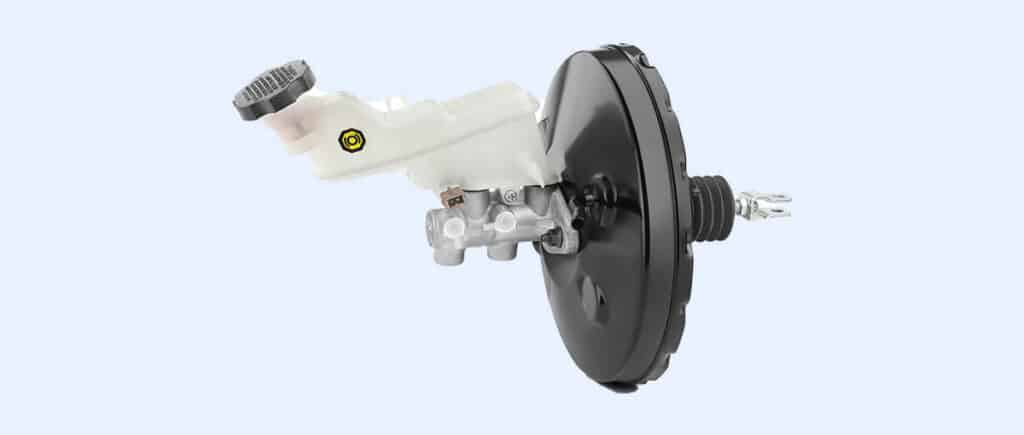
Brake Boosters Explained: What They Are and How They Work
A brake booster is a critical component in a vehicle’s braking system, designed to amplify the force applied to the brake pedal, making it easier for the driver to stop the vehicle. Using vacuum pressure from the engine or an external pump, the brake booster multiplies the pressure exerted by the driver, reducing the required pedal effort and improving braking performance. The brake booster is typically located between the brake pedal and the master cylinder, ensuring seamless integration into the braking system.

Symptoms of a Failing Brake Booster: When to Take Action
A failing brake booster can manifest itself in several ways, indicating that it’s time to take action. Some common symptoms include:
1. Hard or stiff brake pedal: If your brake pedal feels harder or stiffer than usual, it could be a sign that the brake booster is not functioning correctly.
2. Reduced braking performance: Difficulty stopping the vehicle or increased stopping distances may indicate a problem with the brake booster.
3. Hissing noise: A hissing sound when applying the brakes could be due to a vacuum leak in the brake booster.
4. Engine performance issues: In some cases, a failing brake booster can cause the engine to stall or idle poorly due to a vacuum leak.
Assessing Your Brake Booster: Performing a Vacuum Test
Before replacing your brake booster, it’s essential to confirm that it is the source of the problem. Performing a vacuum test is a straightforward way to assess your brake booster’s functionality. Start by locating the vacuum hose connected to the brake booster and disconnecting it. Then, attach a vacuum gauge to the hose and start the engine. A properly functioning brake booster should maintain a steady vacuum reading of around 18-22 inches of mercury. If the reading is significantly lower, it could indicate a problem with the brake booster or vacuum system.
Gathering the Right Tools and Materials for Brake Booster Replacement
To replace your brake booster, you’ll need the following tools and materials:
1. Replacement brake booster
2. Socket wrench set
3. Screwdrivers (flathead and Phillips)
4. Line wrenches
5. Vacuum gauge
6. Brake fluid
7. Rags and a container for brake fluid
8. Jack and jack stands (if necessary)
9. Safety glasses and gloves
Step-by-Step Guide to Brake Booster Replacement: A DIY Approach
1. Park your vehicle on a level surface, engage the parking brake, and disconnect the negative battery terminal.
2. Locate the brake booster and master cylinder assembly, typically found on the firewall of the engine compartment.
3. Carefully disconnect the vacuum hose and any electrical connections from the brake booster.
4. Remove the master cylinder from the brake booster, being cautious not to damage the brake lines or spill brake fluid.
5. From inside the vehicle, disconnect the brake pedal linkage and any additional hardware connecting the brake pedal to the brake booster.
6. Remove the brake booster mounting bolts and gently remove the brake booster from the vehicle.
7. Install the new brake booster, aligning it with the mounting holes and securing it with the mounting bolts.
8. Reconnect the brake pedal linkage and any additional hardware from inside the vehicle, ensuring that the brake pedal functions smoothly and returns to its original position.
9. Reinstall the master cylinder onto the new brake booster, taking care to properly align it and reconnect the brake lines. Be prepared to top off the brake fluid if needed.
10. Reconnect the vacuum hose and any electrical connections to the brake booster.
11. Reconnect the negative battery terminal and start the engine. Test the brake pedal for proper operation and ensure that the brake booster is functioning correctly. If necessary, perform a vacuum test to confirm proper vacuum pressure.
The Cost of Brake Booster Replacement: DIY vs. Professional Service
The cost of brake booster replacement can vary depending on whether you choose to tackle the job yourself or enlist the help of a professional service. By taking the DIY approach, you can save on labor costs and only need to cover the cost of the replacement brake booster and any necessary tools or materials. This can range from $100 to $300, depending on the make and model of your vehicle. Professional service costs can be significantly higher, ranging from $300 to $800 or more, depending on the complexity of the job and the labor rates in your area.
Avoiding Common Brake Booster Replacement Mistakes
To ensure a successful brake booster replacement, avoid these common mistakes:
1. Failing to diagnose the problem correctly: Before replacing your brake booster, perform a vacuum test to confirm that it is the source of the issue.
2. Not bleeding the brake system: After replacing the brake booster, it’s essential to bleed the brake system to remove any air bubbles and ensure optimal braking performance.
3. Overtightening bolts and connections: Be cautious not to overtighten bolts and connections during the replacement process, as this can cause damage to the brake booster or other components.
4. Not topping off brake fluid: After reinstalling the master cylinder, check the brake fluid level and top off as necessary.
Brake Booster Maintenance: Tips for Ensuring Longevity and Performance
To keep your brake booster functioning optimally and prolong its lifespan, follow these maintenance tips:
1. Regularly check the vacuum hose for cracks or leaks, as these can compromise the brake booster’s performance.
2. Monitor your brake fluid levels and quality, topping off or replacing the fluid as needed.
3. Inspect your brake system regularly, paying attention to the brake booster, master cylinder, and other components for signs of wear or damage.
4. Address any braking issues promptly to prevent further damage and maintain your vehicle’s safety.
Enhance Your Vehicle’s Safety with a Reliable Brake Booster
A properly functioning brake booster is essential for maintaining your vehicle’s safety and braking performance. By understanding the role of the brake booster, recognizing the signs of a failing booster, and following this ultimate guide to brake booster replacement, you can ensure that your vehicle remains safe and responsive on the road. Regular maintenance and prompt attention to any issues will help prolong the lifespan of your brake booster and keep you driving confidently.