
Introduction: The Fundamentals of Charging a Car Battery: What You Need to Know
Think of a car battery as the heart of your vehicle. It needs to be in tip-top shape for the car to run smoothly. But what happens when this crucial element falters? That’s where this guide comes in. Whether you’re a novice driver or someone who’s tinkered around the garage, knowing how to properly charge a car battery can be a real lifesaver.
Identifying the Status of Your Battery: Can a Dead Battery be Charged?
Let’s make one thing clear: not all dead batteries are candidates for the zombie apocalypse. Some can be resurrected, while others belong in the recycle bin. To assess the condition, use a voltmeter. A reading between 12.4 to 12.7 volts usually indicates a healthy battery. If it’s hovering around 12 volts or lower, you’re entering a danger zone of potential irreversible damage. But even then, you might still have a chance at revival if you act quickly. So, get that voltmeter out and play automotive detective.
If the voltmeter reads something closer to a horror movie rating than a perfect 10 (or rather 12.7), you might be looking at a battery in need of professional assessment or replacement. Batteries have a lifespan, and sometimes even the best charging tricks can’t turn back the clock. In such cases, it’s wise to consult a professional. They’ll let you know if it’s time for a battery replacement or if your battery can still hold the charge for another round of life.
Essential Tools and Preparations: Setting up for Charging
Safety Gear: The Non-Negotiables
• What You Need: Safety gloves and goggles are not optional; they’re a must. Batteries contain corrosive acids that can be harmful.
• Why It’s Important: Gloves protect your hands from acid and electrical shocks, while goggles safeguard your eyes from potential acid splashes or sparks.
• Tip: Opt for rubber gloves and industrial-strength goggles for the best protection.
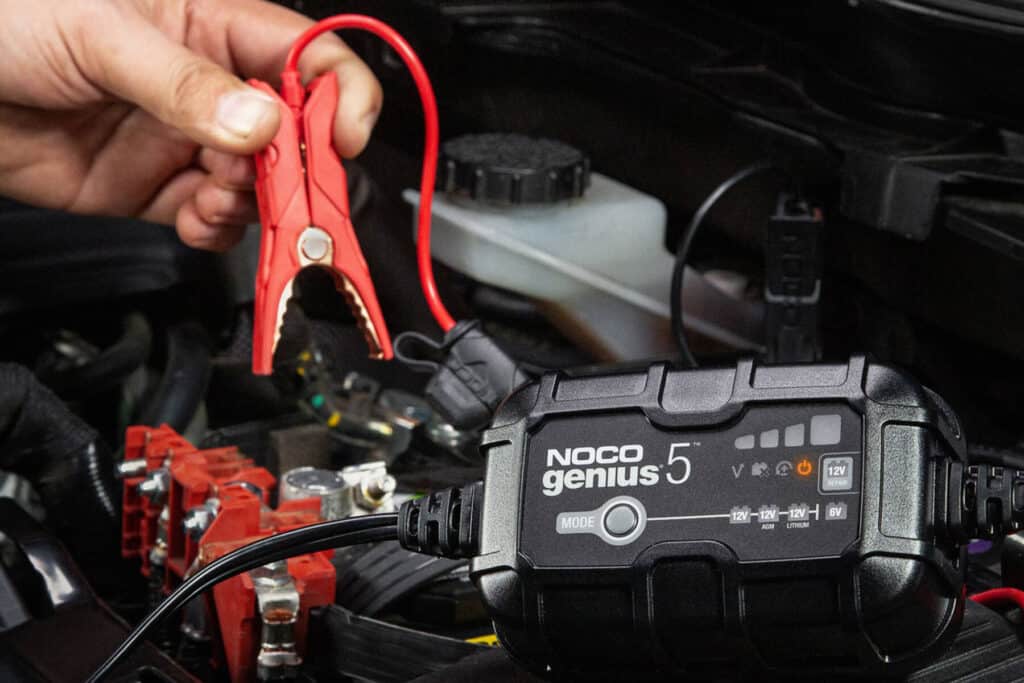
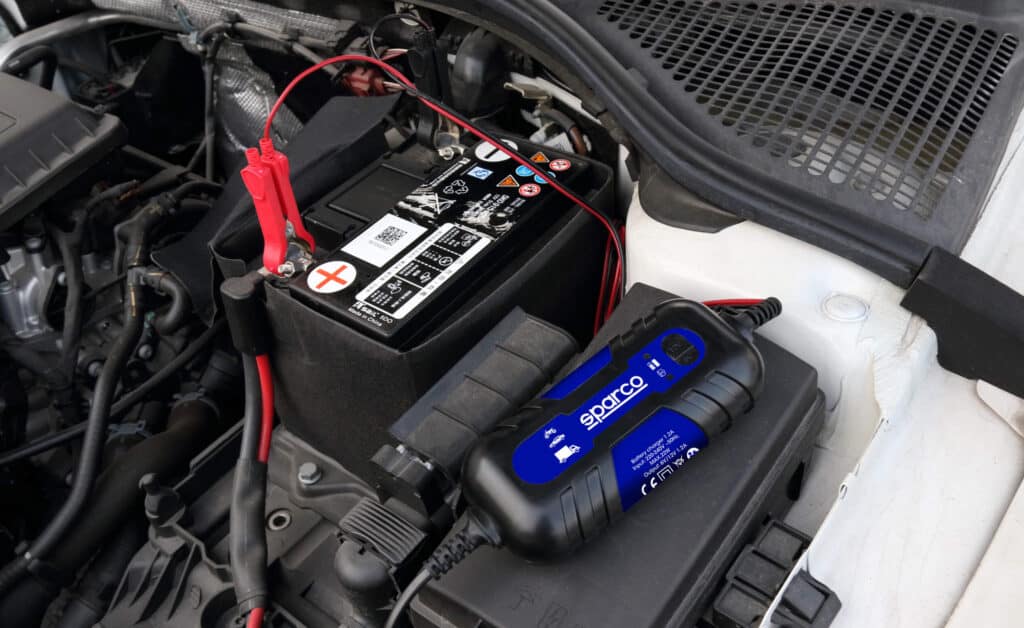
The Charger: Your Battery’s Lifeline
• What You Need: A reliable car battery charger compatible with your battery type.
• Why It’s Important: A good charger will not only revive your battery but also extend its life when used properly.
• Options: Chargers come with varying voltage and features, like fast-charge settings or auto-shutoff. Choose one that suits your needs and budget.
Jumper Cables: The Emergency Backup
• What You Need: A set of jumper cables with sufficient length and thickness.
• Why It’s Important: They’re your go-to for quick, emergency charging from another vehicle.
• Quality Matters: Opt for cables with thick, insulated wires and sturdy clamps for a safer and more effective jump.
Ventilation: A Breath of Fresh Air
• What You Need: A well-ventilated area for charging.
• Why It’s Important: Car batteries can release hydrogen gas during the charging process, which is potentially hazardous.
• Tip: If charging in a garage, keep doors and windows open. Avoid confined spaces to mitigate the risk of gas accumulation and potential ignition.
Checklist Before Charging
Before you plug in or connect anything, make sure you’ve got all your tools in place. Double-check the charger’s settings and ensure you’re in a well-ventilated area. Safety is paramount, so take your time to get it right.
The Charging Sequence: Positive or Negative First?
In the world of car batteries, sequence matters. Always connect the positive (+) terminal first. This is usually marked by a red cap or the symbol “+”. Doing so minimizes the risk of a short circuit, and it makes the whole process more efficient and safer. Secure the positive connection, double-check, and then, only then, attach the negative (-) terminal.
After the positive terminal has been securely connected, you can proceed with attaching the negative one, often indicated by a black cap or the symbol “-“. And here’s the reason for this sequence: if you connect the negative terminal first, there’s a chance of creating a short circuit when you connect the positive terminal, especially if the other end of the cable touches any part of the car’s frame. So remember, in the world of car batteries, always go positive first. It’s like the car repair version of “ladies first,” except the stakes are a working vehicle instead of mere politeness.
Methods for Charging: Direct Charging vs. Using Jumper Cables
Direct Charging: The Marathon Method
• How It Works: Direct charging is akin to a slow and steady marathon for your battery. You’ll connect the battery to a charger that feeds it a steady stream of electricity over an extended period.
• Benefits: This method gives a more thorough, deep charge, maximizing battery lifespan and performance.
• Drawbacks: It’s time-consuming, typically requiring several hours or even up to a day depending on your battery and charger.
• Best For: Situations where you have the luxury of time, and you’re looking for a lasting charge. It’s the go-to method for reviving a dead battery if you’re not in a rush.
Using Jumper Cables: The Sprinter’s Dash
• How It Works: When you’re using jumper cables, you’re essentially borrowing energy from another vehicle to kickstart your dead battery.
• Benefits: It’s quick, easy, and doesn’t require a separate charger. You can get your car running in minutes, making it ideal for emergencies.
• Drawbacks: The charge is often superficial and temporary. It won’t solve underlying battery issues and can be a drain on the assisting vehicle’s battery.
• Best For: Urgent situations where you need to get your car running immediately. But remember, it’s a short-term solution that requires follow-up action for best results.
Your Choice, Your Situation
The best method for you hinges on your immediate needs. If you’ve got time to spare, direct charging is the gold standard. But if you’re in a bind and need a quick escape route, jumper cables are your best friend. Just remember that jumper cables offer a temporary fix, so you’ll still need to properly charge or replace your battery soon.
Charging Duration: How Long Should You Let Your Car Run or Use a Charger?
Time is of the essence, especially when you’re stranded with a dead battery. But how long does it take to charge a car battery? When you’re directly charging a battery with a dedicated charger, the duration depends largely on the battery’s capacity and the charger’s output. Typically, a standard 12-volt car battery can take anywhere from 4 to 24 hours to fully charge. Variables like your charger’s amp settings and the battery’s residual charge also play a role in determining the exact time. Keep an eye on your charger’s indicator lights; most modern chargers tell you when the battery is fully charged.
If you’re in a hurry and using jumper cables, the rules of the game change a bit. Jumper cables can offer a quick charge sufficient to get you up and running, but they don’t provide a long-term solution. After jumping your battery from another vehicle, you should let your car run for at least 20-30 minutes to allow the alternator to charge the battery. However, this is a makeshift solution; the best course of action would be to properly charge the battery as soon as possible to ensure it has a full, healthy charge.
Special Cases: What to Do When Conventional Methods Don’t Work
Sometimes life throws us a curveball, and it’s no different when it comes to charging car batteries. It’s crucial to remember that jump-starting your car and letting it run to recharge the battery is a short-term fix. It won’t provide the deep charge that batteries need for optimal performance, and it could potentially damage your car’s electrical system.
When the usual tricks just aren’t cutting it, it’s a red flag that you could be dealing with a more severe issue. It could mean your battery has reached the end of its life, or there might be a bigger mechanical problem at hand, such as a malfunctioning alternator. In these cases, professional evaluation is the next step you should take. Don’t hesitate to reach out to experts for a thorough check-up and specific advice tailored to your vehicle’s needs.
Conclusion: Taking the Charge: Your Complete Guide to Car Battery Maintenance
Armed with this knowledge, you’re now well-equipped to charge a car battery and understand its nuances. Remember, when in doubt, or when conventional methods fail, Uchaincs has got your back. Book an appointment today for expert solutions tailored to keep your vehicle—and your wallet—in the best shape possible.